R & D

We at Metalcoating keep the mind in constant training because we like to imagine ever new and exciting development horizons. Since 1984 we have been studying and designing new coatings, to build the future piece by piece for our company and our customers, with the energy of ideas and the force of intuition. We like to get ahead of the market by putting in all our best resources.

We are constantly updating to ensure compliance with regulations, such as REACH and RoHS, and to improve the characteristics of our processes as much as possible.
We are the first company to offer a valid alternative to the hard chrome plating process (CarboNiP).

We work closely with the Politecnico of Milan for new projects, and our research is always based on new patents.

INTERNAL LABORATORIES

Within our company, we have a laboratory for chemical research and a metallographic laboratory, both set up for the improvement of our high phosphorus corrosion resistant nickel as well as new coatings.

To achieve our objectives, in addition to know-how, the equipment plays a vital role. Both in the development and process phases, advanced analysis techniques are employed in order to conduct the reactions in the most linear manner possible, an integral part of a quality system. Below is a brief description of the equipment used

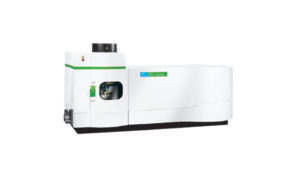
icpThe I.C.P. is a highly important analysis instrument as it is capable of discriminating the majority of the elements present on the periodic table. All metals can be identified and quantified through an I.C.P. analysis, thanks also to its ability to run multi-element analyses on the same sample. In our case, we check, identify and quantify potential pollutants in the pre-treatment and treatment solutions. We perform the environmental self-control procedures so as to internally monitor and advance potential pollution sources to the order of 1 ppb and 10 ppb.

polarografo_ok

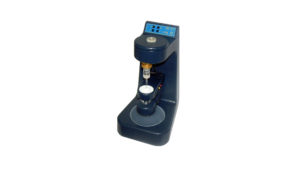
The polarograph is a versatile but very precise analysis instrument. For each element to be discriminated there are quite specific analysis conditions. Furthermore, to previously knowledge of the element to be analysed is necessary as it is only able to discriminate 1-2 elements at a time. It is normally used for the determination of heavy metals to the order of 0.1 ppb and 1 ppb. Particularly suitable for the analysis of traces of pollutants.

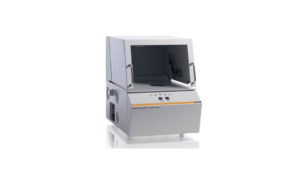
x-rayThe X-ray equipment is able to analyse the thickness of our coating regardless of the magnetic behaviour of the base. While common probes are capable of measuring the thickness of a non-magnetic deposit on a ferritic base, depending on the magnetism of the base and depending on the amount, phosphorus deposited on the nickel phosphorus deposit may be more or less non-magnetic. This occurs also in cases where you want to determine a thickness of the post coating heat treatment, where the magnetic behaviour of the coating is subject to variations. Therefore, measurements may not be entirely correct. For this reason, another technique has been chosen for the determination of the thickness irrespective of the magnetic behaviour of the base and the coating. We also use this technique for the determination of the alloys, steels and brass to allow for better coordinate the pre-treatment operations.

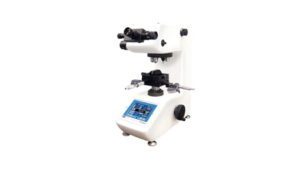
microdurometroThe microdurometer is a fundamental measurement instrument both for the evaluation of the hardness of the coating we have just deposited, and for checking the efficiency of the heat treatment, in order for the treatment to achieve the hardness required by our client. The hardness is expressed in Vickers and not Rockwell because the Vickers technique is the technique assigned to our treatment by the international system.

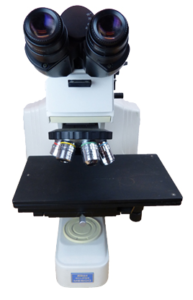
microscopio metallograficoOur microscope is not a simple optical microscope, it has a motorized Z axis capable of accurately analysing a surface and creating a 3D morphological projection. This allows us to verify the porosity on the materials, the number of pores per cm2, their width and their depth. In addition to this we use the microscope to perform the characterization of the deposit, detection of failures, analysis of the thickness through the metallographic section and particle counting if present and incorporated into a coating.

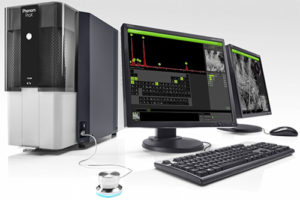
STRUM_SEM_evidThe scanning electron microscope (SEM), is one of the most cutting-edge microscope techniques. Unlike the common microscopy, magnifications not limited to 1000X are, can get up to 135,000X, therefore, we can evaluate defects in materials that would be virtually impossible to establish with common microscope techniques. Furthermore, our system has an EDS probe which is able to analyse the possible presence of contaminants on the surface, as well as constantly assessing the content of phosphorus in the coating.

EQUIPMENT CREATED BY US

HYDROGEN SENSOR

In an electroless reaction it is well known that hydrogen evolution denotes a metal deposition, the greater the evolution of gas the greater the yield, and vice versa.

The Metalcoating designed in its own laboratory a system that detects and quantifies the amount of hydrogen from the reaction which allows us to determine in the research stage whether a stabiliser is suitable, what they should be placed, and also evaluate the behaviour of complexing substances.

All this takes place in real time as the instrument is connected to a data logger that displays the progress of the reaction

TENSIOMETER

It is a tool that serves to detect and record the tensions of a metallic coating in real time, i.e. during an electrodeposition.

The force in grams is detected by a load cell, the signal once conditioned is initiated as an analogue output to a data logger that will translate all into the form of a graph

The phenomenon of the tension is accompanied by the development of hydrogen; in fact it imposes a force to the sensor cathode until it starts bending over on itself, this force is strictly conditioned by various factors such as the density of current, temperature, pollutants etc ….

The instrument is able to detect in real time the tensions which develop during the phase of chrome plating, and if necessary interact with a PLC in such a way as to bring the phenomenon into acceptable and predetermined values.

The analogue signals which are obtained are plotted on a graph.

By continuously monitoring a plating solution during his work, it is possible to extrapolate its critical point, in other words, this tool is able to construct the history of the chemical solution over time.

Call Now Button